How I Found My "Niche"

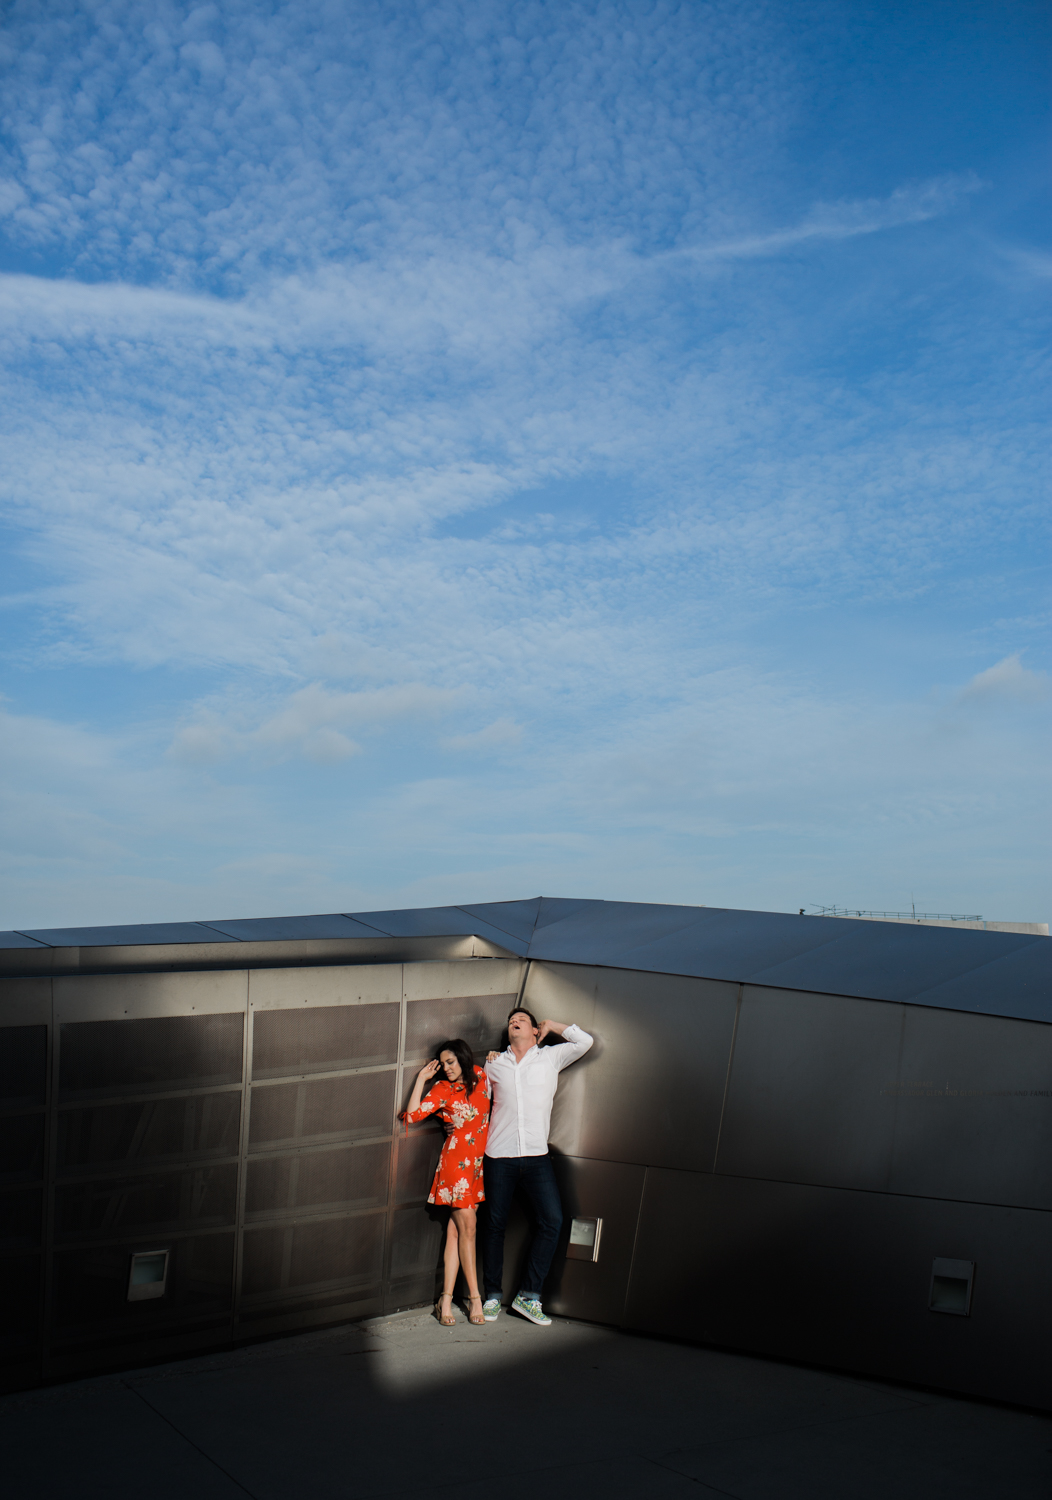
amanda-brian-sneaks-12.jpg

I wasn't ever one of those artists that had an exact career trajectory. I knew what I liked and I knew what I didn't like, but I never said to myself, "I know I want to be a ____." I didn't even know for sure if I wanted to be a photographer at all. I kind of just thought being a photographer sounded cool.

When I was in school, I was really into studio fashion work and portraiture. My senior thesis project was based around a fictional world of characters from songs by the Beatles, such as Eleanor Rigby, Lady Madonna, and the Taxman. I did everything from the makeup to the lighting.

And I loved it.

"Taxman" 2008

"Taxman" 2008

When I started shooting weddings in 2012, I thought this love of fantasy would turn into me attracting couples that only did theme weddings, which is so niche I didn't even know where to start marketing to those cool people.

So instead, I started to encourage my friends to play dress up. And by "encourage" I really mean "force." I knew I needed a portfolio to reflect the type of photos I wanted to eventually be paid to take.

The first mock engagement session I ever did was a play off the movie Moonrise Kingdom. The movie had just come out at that point, so the idea was still new and exciting (but now, I think I've seen a million Moonrise Kingdom engagement sessions).

I swear this was original in 2012

I swear this was original in 2012

Now I know that these types of "mock sessions" are really just called "styled shoots" in the industry.

Once I started getting busier, my clients began looking to me for suggestions on what to do for their engagement session. Honestly, I just wanted them to have fun. And I wanted to have fun, too. I knew my job would get really tedious really quickly if every shoot had the same prom poses with the same location.

And then it clicked.

Everyone is unique in their own way, right? Maybe my clients  don't like playing dress up, but there is certainly at least SOMETHING they like to do. Maybe they don't normally go to parks and hold hands and do corny things while skipping through the grass into the sunset. I honestly don't know if I'd want to meet the person that does this in their spare time.

So I started to telling my clients, when it comes to planning your engagement session:

I was open to any and all suggestions. No idea was too weird.

Then, it happened. One of my couples loved the idea of doing something that was totally "them." They didn't want to gaze into each other's eyes on the beach at sunset. They didn't want sunset at all, they wanted to get tattoos together at night.

They still gazed into each other's eyes, though. It was an engagement session, after all.

They still gazed into each other's eyes, though. It was an engagement session, after all.

That shoot was challenging and fun, from figuring out the lighting to getting to know my clients, (who are now dear friends of mine and just had their first baby!).

I was hooked. And thus began my career-long obsession with doing anything my couple felt would be "fun." 

I photographed couples going on perfect dates. I started working with props.

I went on a road trip all the way up the coast to Big Sur.

And on our way home we stopped at In n' Out.

Some couples really went all in.

...while others chose to stay at home and make s'mores.

And these two just wanted to embrace in the snack aisle.

That's the most romantic place I know, too.

That's the most romantic place I know, too.

It's really rare that engagement sessions get published anywhere. Weddings are where it's at. No one wants to see 20 photos of people who they don't know making out, they just want to know about the things. So trust me, I'm literally only doing these because I think they are fun for everyone and they help me really get to know the people I work with. 

So, there you have it. My niche. I have no idea how it will look 5 years from now, but I know I'm going to meet a ton of people with incredible imaginations and I'll have a lot of fun along the way.

And I can still play dress up whenever I want to.
And I can still play dress up whenever I want to.

the best business (and life) advice i ever got... from michael phelps

Olympian Michael Phelps to date has 28 medals, 23 of which are gold medals. He is not a business owner. But I recently heard a story about why Phelps is so consistently successful, and it has become the single most helpful piece of advice that I bring with me (along with my camera bag) to every gig.

Everyone has heard of "The Secret," right? If you can believe in it, you can do it? Well, whoever wrote that crap should've talked to Michael Phelps. This is the real "secret":

The key to success isn't visualizing what should go right. The key to success is visualizing what could go wrong, and having a plan of action.

Michael Phelps trains every day. He's an Olympian, duh. But you see, all Olympians practice. Nothing about practicing makes Michael Phelps special or different from any other athlete. The difference is Michael Phelps takes his practice to the next level. He uses visualization techniques before, during, and after practice. He visualizes the perfect race. He visualizes how it feels if everything goes right.

And then he starts to visualize things going wrong.

One of these visualizations included a common issue that swimmers face: goggles filling with water. I swam competitively in high school and I know first-hand that if you are blind, it's nearly impossible to win a race. You can't see the line at the bottom of the pool to stay on course. You can't see the lane dividers. You can't see, period. 

So, Phelps would practice in the dark. He memorized approximately how many strokes it took to get from one end of the pool to the other. And he'd visualize these blind stokes every day before and after practices.

In 2008 during the Beijing Olympics, Michael Phelps's goggles filled with water when he dove into the pool during the 200m Butterfly. So he counted his strokes, and he finished the race blind. And he won gold.

OK, so now you're saying,

From Superbad

but I need you to just sit right back down and be patient because I'm about to drop some serious knowledge on you. 

Picture this:

I attended a rehearsal for a wedding I recently photographed, and during the entire run-through of the ceremony I noticed a family-member recording video on her iPhone. This normally wouldn't be an issue, but this guest in particular was way up in the bride and groom's personal space. I'm talking closely hovering around the couple and circling them like a hawk through the entire rehearsal. Had it been the actual wedding day, she would've been blocking the bride and groom in every. single. one. of my photos.

Not really the most romantic memories to have. I was hired to do a job, and something (in this case, someone) was literally standing in my way of success.

This could not happen on the next day during the wedding. But what was the most professional way to handle this? It's time to use the Phelps method. Or, as I like to refer to it:

W.W.M.P.D.? what would michael phelps do?

*This is a photo of me doing my job, no matter what the day throws at me. Photo by Victoria Gold Photography

*This is a photo of me doing my job, no matter what the day throws at me. Photo by Victoria Gold Photography

So what WOULD Michael Phelps do to prepare for this? Would he risk insulting her by pulling her aside and kindly asking her to sit down? Is she the type of person to not listen, even if she was asked politely? 

It's not my job to tell someone they can't take their own photos during a loved one's wedding day (I can talk more about my opinions on "unplugged" weddings another day). But for all I knew at the time, if I didn't do something, it had great potential to interfere with my job and jeopardize the success of the wedding photos. 

So I decided I would sleep on it and before I went to sleep, I visualized it happening during the ceremony. And I came up with a game plan.

casey-brodley-los-angeles-best-wedding-photographers-4.jpg

step one:  be aware of the potential issue and do what you can to prevent it from happening before anything actually happens.

Phelps practiced in the dark, so you should too (metaphorically). In  my situation, in an effort to stay professional and not insult any guests, I pulled the officiant aside on the day of the wedding before the ceremony and asked her to make a tiny announcement to guests as they take their seats : stay seated during the ceremony and to keep clear of the center aisle if they wanted to take a photo. I knew if I at LEAST had the aisle clear of guests, I'd get all the necessary photos for the bride and groom. And if they stayed seated, I'd have even more angles and opportunities for other photos, too.

Step Two: Figure out your damage control.

Say you do everything to prevent the dreaded thing from happening, and it still happens. What are you going to do?

Look, you can only control so much. You cannot control what other people do. But if you want to be a professional, you need to know how you are going to handle a tough situation when it's thrown at you. 

I thought, if worse comes to worse I could always maneuver or politely tap a shoulder to remind them there is a professional there that is paid to get "the shot." The worst case scenario would be physically pushing someone out of the way (which I have done and am not afraid to do. I'm watching you, Uncle Bob).

Fortunately, my prevention tactic worked. The officiant politely reminded everyone to stay clear of the aisle for the photographers, and everyone stayed seated. I even think the announcement reminded guests that they were there to witness and be included in photos! 

Step Three: be a total badass on the reg and don't be sorry about it.

You can apply this worst-case-scenario technique to anything: A big presentation. Asking your boss for a raise. Traveling somewhere new. Your wedding day. Visualize the possibilities of what could go wrong, think of ways to prevent it, and then think of your back up plan. E-mail your presentation file to yourself, just in case you forget the USB. Figure out where you'd need to go if you lost your passport abroad. Get a tent in case the weather predicts rain during your outdoor wedding day.

It's also an important practice to help face our fears. What is the worst-case scenario? Lose your job? Will you die?  (If you are likely to die, maybe it's not worth it to begin with).

What are some solutions or ways to avoid those possibilities? What's the back-up plan? 

And most importantly, even if things don't go according to any plan...


Until next week,

Casey


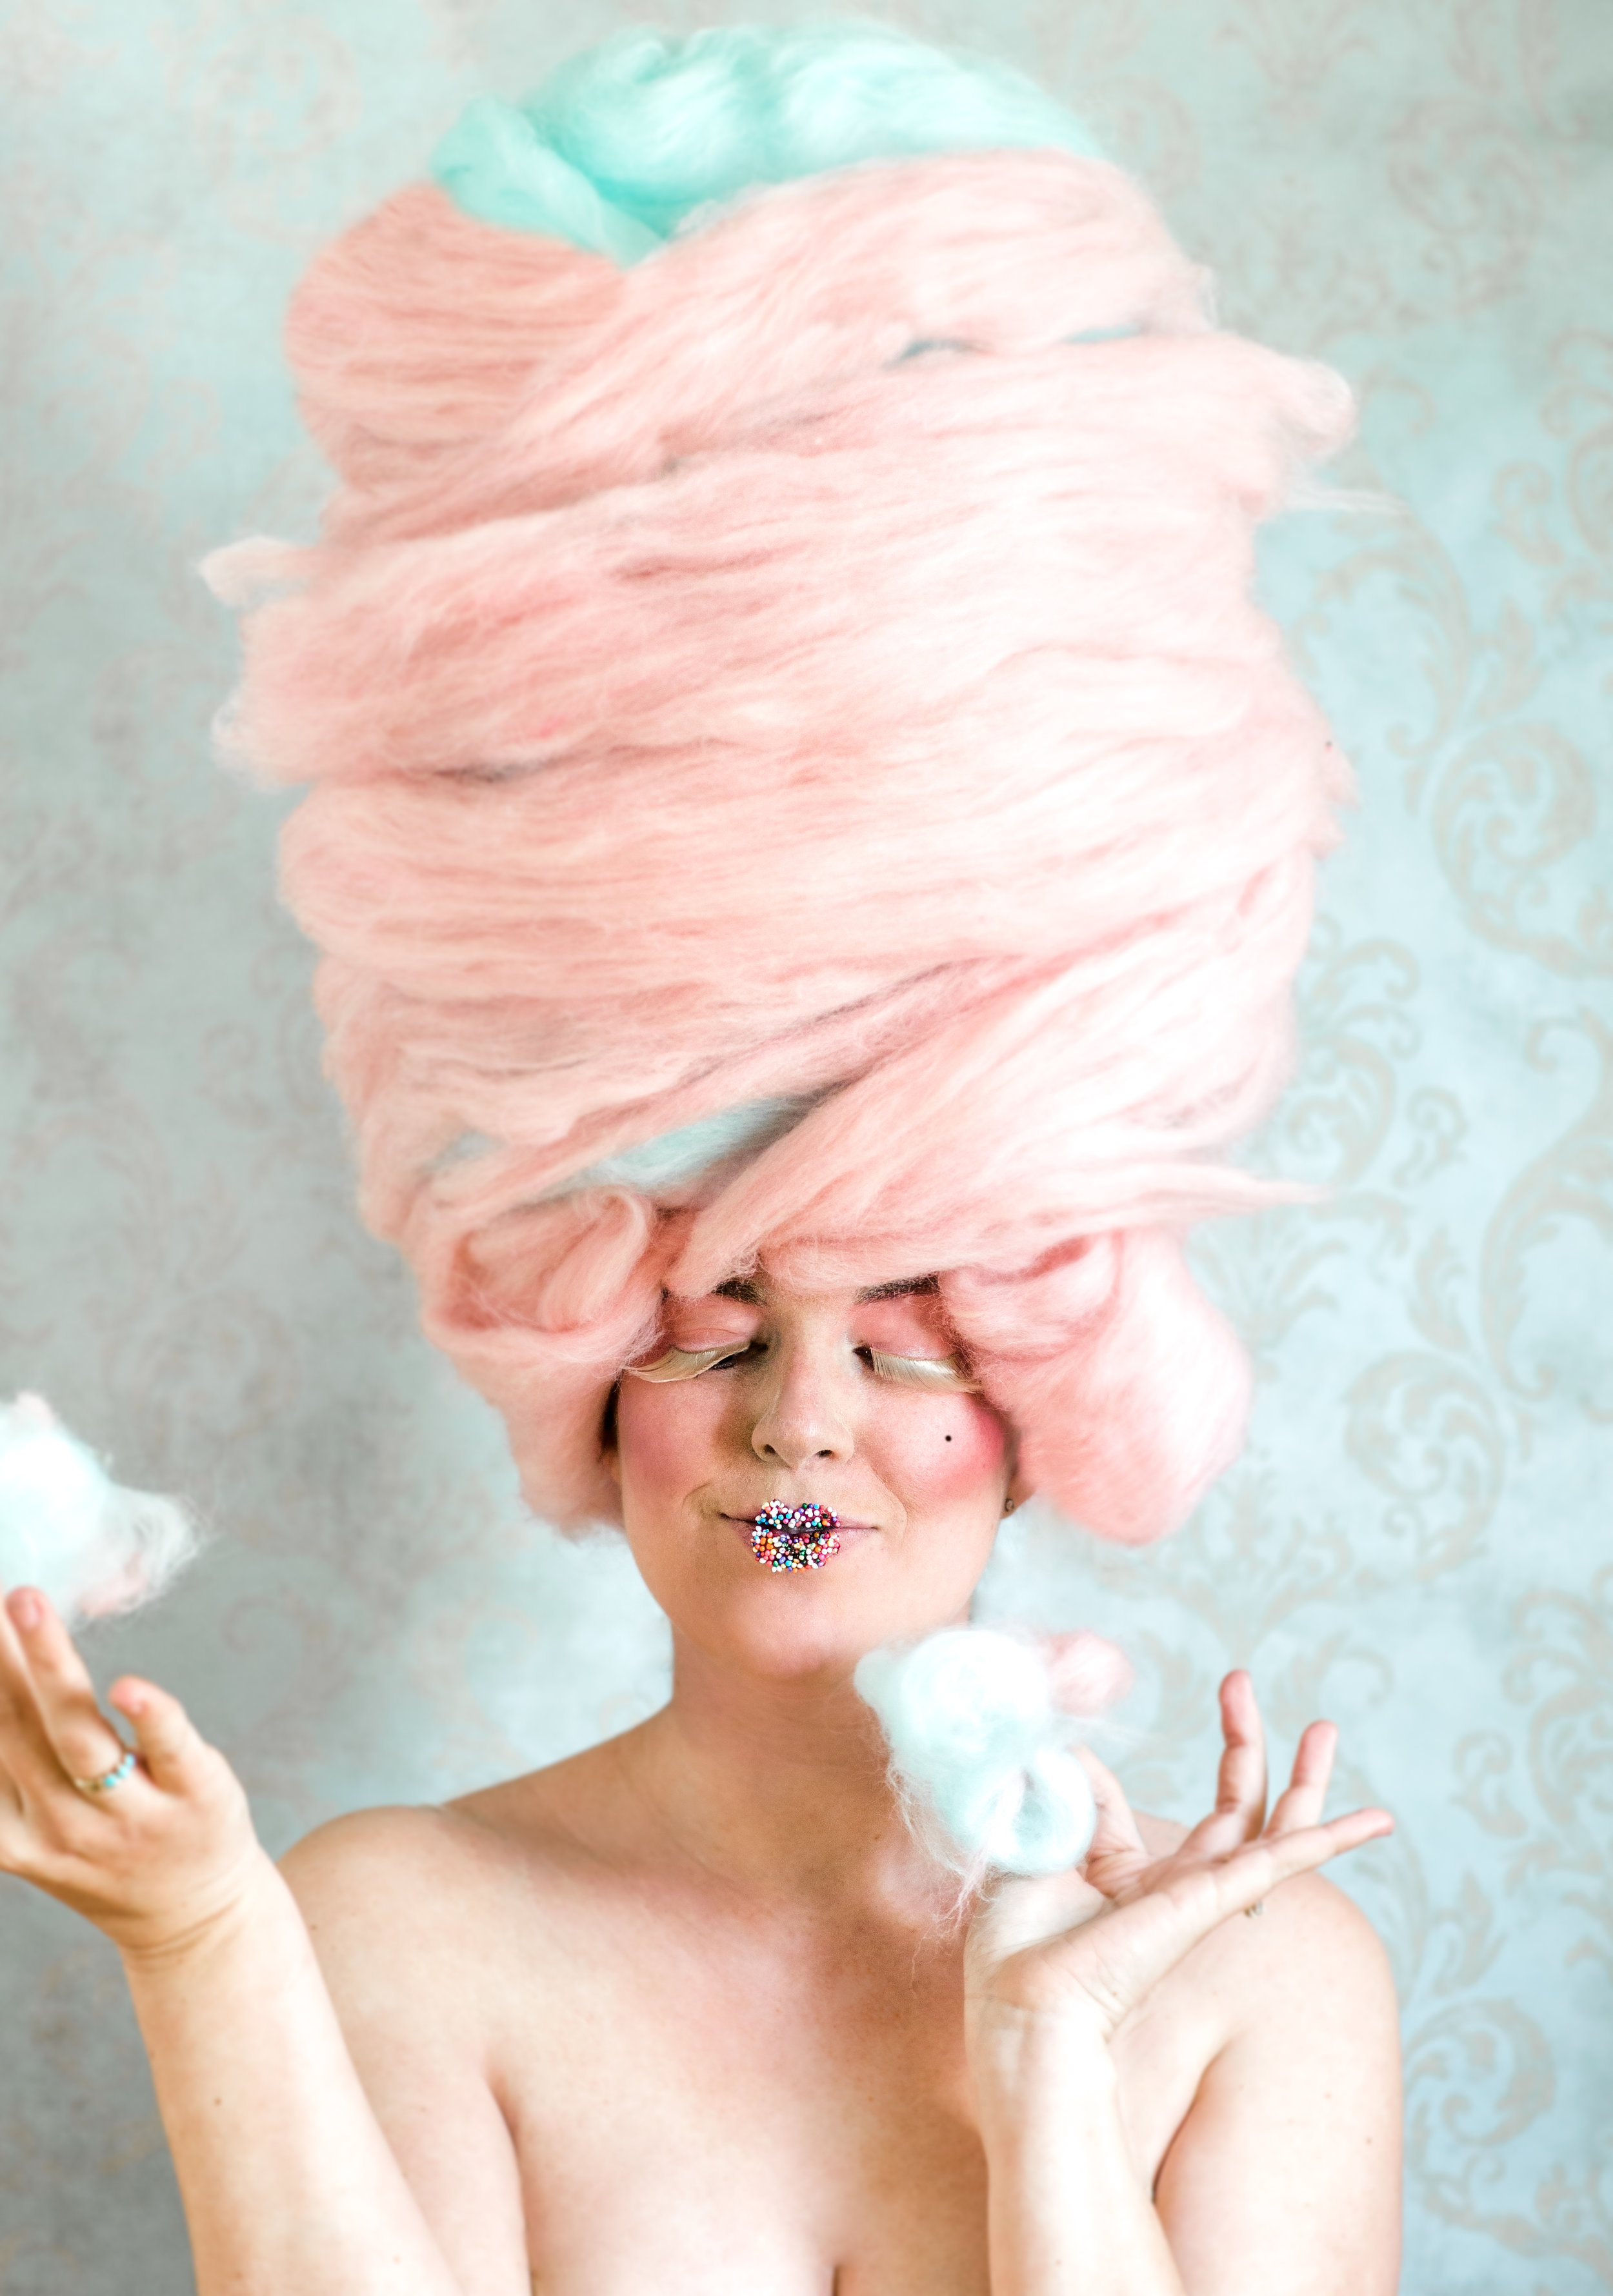
Photo Prop Recipe: Cotton Candy Wig + baroque backdrop DIY

Want to learn how to make a wig that looks good enough to eat? 

Here's how:

Wig Ingredients:

Styrofoam Head (to work on your wig)

Poly-Fil batting (crib size 45" x 60" roll)

Roving Wool in your choice of color (I chose light pink and light blue for cotton candy colors) or dye your own if you're feeling ambitious! I got about 1 lb total, but I had lots leftover. 16 oz should be plenty.

8-inch wreath base

Styrofoam Cone

T-pins

Spray adhesive

Optional: Candy, rhinestones, glitter, sprinkles, or any other accents you would like to add!

1. Take your batting and cut into 1 ft wide strips. Wrap your wreath base and cone in batting and secure with T-pins. Use the styrofoam head to test balance. The ring should rest on the crown of your head, not fit completely over your head. It's simply a base support the cone.

2. Once individual parts are wrapped with one layer of batting, use excess batting to wrap (like a towel on your head after the shower) from the base of the mannequin's head where it meets the neck up. Secure with T-pins until you have a cotton candy shaped base. The wig base should sit balanced on the mannequin's head at this point. If it doesn't adjust the placement of your wreath and re-wrap until wig stands on it's own.

casey-brodley-process-2.jpg

3. Now it's time to start building! Use your spray adhesive to go over the base in sections as you swirl the roving wool (like a tornado) from the base of the wig to the top. Do not use spray adhesive like hairspray after it's wrapped or it will stay sticky and take away from the effect. Only use it to attach the wool to your poly-fill base.

4. To make the curls that frame the face, flatten a piece of wool and wrap around your finger. Pin the cylinder shaped curls with a T-pin to the wreath base.

Remember that cotton candy is wispy and fluffy! Play around with how much you can pull the wool apart, fluff whenever you place a new swirl, and make lots of layers. Play around with it! I had about 5 different versions of this made before I was totally satisfied by the way it looked.

Tip: Layering is key! A little roving wool can go a long way.


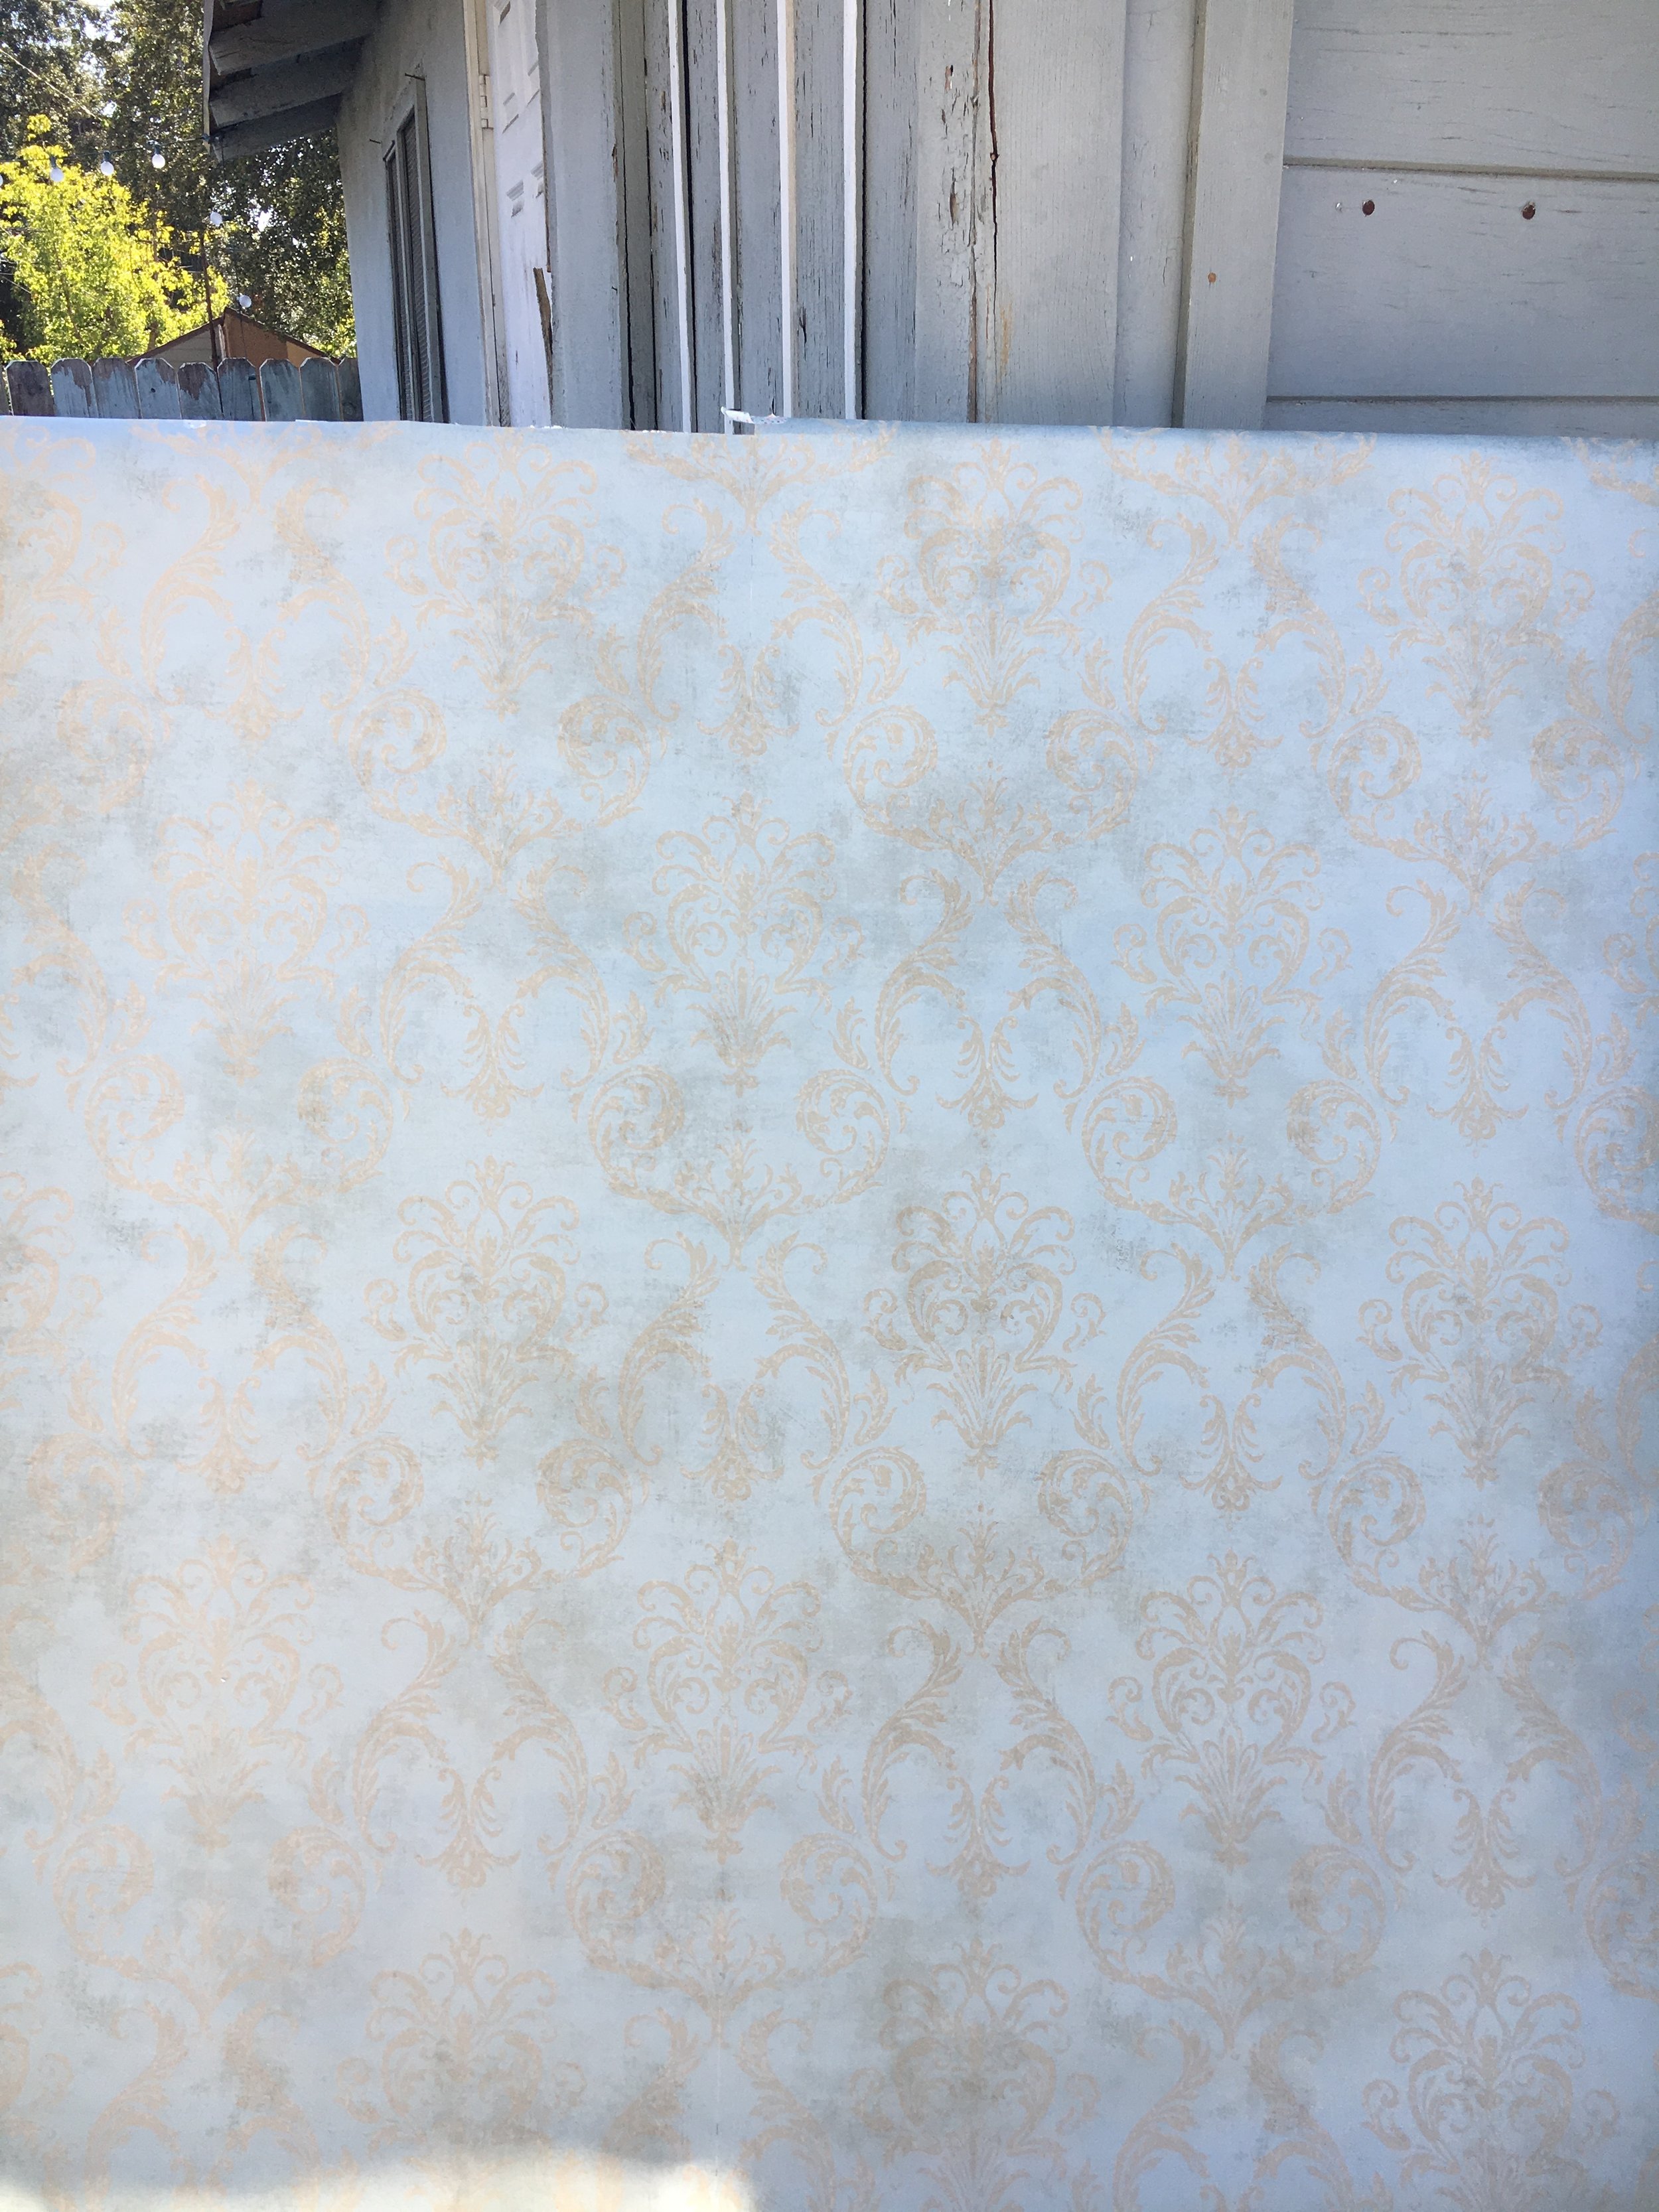
*BONUS TUTORIAL: Make a faux wall backdrop!*

Backdrop Ingredients:

Polystyrene sheet, cut in half so it's 2 4x4 sheets (or, if you want to do a full body portrait, leav it whole

Vintage Wallpaper (or, really, you can use whatever you want. paint it, go crazy. live your own truth.) I got the wallpaper pictured on Etsy.

Spray Adhesive

1. Both Sides of the Polystyrene should have a plastic film. Peel the shiny side off both halves.

2. Use your spray adhesive and evenly cover both the back of your wallpaper and the polystyrene side you just peeled off in step 1. It's important to cover both the back of the paper and the surface of the foam. Be patient while you're lining it up, you are able to peel and re-stick the paper at any time. No pressure.

IMG_2526.JPG

You can see similar in-process photos for this technique on Oh Joy!

3. In order to replicate the lighting setup of my photo above, I used ONLY natural light. I sat next to a window like so (my body double, Abu, is standing in for me here):

fancy studio, huh?

fancy studio, huh?

Now, if you can have a friend help you take the photo, that helps a lot. Otherwise I set up a tripod and used a remote shutter to take the photos (I pressed the shutter with my toe!).

PS Don't forget to have fun with the makeup, too!

Please let me know if you have any questions! Have fun and make this your own! 

xo,

Casey

*This project was inspired by Marie Antoinette, Sue Bryce's ethereal studio work, and the great Cindy Sherman. Thanks for all the inspiration, ladies.*

10 Tips and Tricks for natural posing and feeling relaxed around the camera

I consider myself a lifestyle/documentary photographer, which means that at events like weddings I try and let everything happen naturally. I rarely interfere with anything during a wedding. That's because the emotion is already there, and anything I do will interrupt that.

But for any other session (engagement, portrait, family) it is harder for my subjects to feel as natural as they would feel around 100 of their closest friends and family. As the photographer, I have to become the person they can let loose around. But HOW do I do that with complete strangers? It's not always easy, but here is a little guide of my techniques and tricks for getting natural and "unposed" photos. 

1. When in doubt, Liquid Courage

If there's anything I know about starting a session off on the right foot, it's alcohol. I encourage all my clients to take a little sip of whiskey or have a glass of wine or something before the session starts. I don't necessarily want you to be drunk, but buzzed enough to take the edge off and make you kinda giggly. Now, if you don't drink, I recommend doing anything else that relaxes you before the session: take a bubble bath, go for a walk, smell a candle, do 100 jumping jacks, go to an aquarium, ride a llama. Anything to get the nerves out.

2. Make your partner laugh

Whisper gross things into his/her ear. Blow a raspberry on their cheek. Make a farting noise with your mouth at the most intimate part of the session. Recall an embarrassing story about the other person. If you are doing a portrait session alone, see tip #1.

3. Props are your friend

caseybrodley-wedding-photographer-3.jpg

Props are a great answer to an age-old question:

Props may seem cheesy or overdone, but they don't always have to be "cutesy." A prop could be anything from a bouquet of flowers to a glass of beer to a balloon. Can you hold it in your hands? Is it not another human? It's a prop.

4. Bring along your pet (for distraction)

Speaking of props, pets are like an in-between category of human meets prop. They are cute, they are fun to be around, and they are a great distraction from mostly anything in life, so why not have them tag along to the session? Animals aren't always easy to work with, though, so if you go this route, invite a friend along to watch your fuzziest family member when you want certain "humans only" photos. Also keep in mind, certain locations do not allow animals at all, so always make sure to run the idea past your photographer (or if you're a photographer reading this, double check the pet policies of the location) before bringing Baxter (or a horse named Saxon) along.

5. Choose a location that feels "like home"

casey-brodley-wedding-photographer-los-angeles_37.jpg

I think I speak for all photographers when I say this: Just because you see something on Pinterest does not mean that's what you are "supposed to do" for a photo session. The location where you choose to shoot makes all the difference in your comfort level and will show on-camera. For example, if you love photos of other people on the beach but you never go to the beach, maybe you should reconsider. Otherwise, the sand in your butt crack may be more noticeable and distracting in a bad way. Think outside of the box! Do you like to go to the movies? Ask your photographer if it's possible to take a little cinematic adventure. Do you like museums? The arcade? Or would you rather not leave your bed? The more comfortable you are, the better, in my opinion.

6. Wear an outfit you feel confident in

lola-drew-sneak-5.jpg

This kind of goes along with tip #5 of the importance of feeling comfortable. Set yourself up for success by wearing something you feel like a total babe/gent in. Consider a few things: If you don't usually wear low cut clothes, wearing something that shows off more cleavage may make you constantly feel like you need to adjust your top. Or, if you never wear suits, maybe hiking up that trail in a suit won't be the best option. What can you wear that you won't feel the need to constantly adjust or worry about getting dirty? Base your outfit choice on the location and what you plan to do during the session. If there is a lot of walking involved, consider bringing a change of shoes. Or better yet, bring an extra outfit to change into for another look (or in case of a wardrobe malfunction).

7. It's OK to be silly.

I encourage silliness (if you like those moody, serious photos, I'm probably not your gal). These days, we need as much silliness as we can possibly get. We all need reasons to laugh. So don't be afraid to joke around and have fun at your photo session. Chase your kids around and tickle them. Drink that glass of beer without using your hands. If you're in public, people will be watching you anyway (you have a photographer following you around, after all). Be weird. It's fun.

8. Don't stand still. Ever.

Try this: put a timer on your phone for 30-60 seconds and try standing still in a pose and keep a smile until the timer goes off. How does your face feel after that? How about your body? Do you feel like you started to tense up after the first few seconds? Do you feel like your cheeks are strained? I have been doing this (and have been human) long enough to know that standing still and holding poses is not only BORING but it shows on your face if you feel strained at all. So, take your photographer's direction but add a little movement. Play tug of war with each other by alternating pulling away and squeezing your partner close. Dance around a little. Shake out your arms and legs in between shots. Alternate which hip you relax your weight on. Little movements make all the difference.

9. schedule your session around the light

OK, I'm going all photo nerd on you with this tip, and maybe it seems obvious. But it's an important one. No one wants to wake up at 5am for a sunrise session (especially me). But if you want to have an empty beach or deserted streets with beautiful golden light, sunrise may be your best bet. An outdoor session planned mid day will not get you great results if your location has zero shade. Do you want to be squinting the whole time? Or even worse, sweating your ass off? No one likes sweaty armpits, especially in photos. If you opt for an outdoor session, consider booking it at sunrise or within the last 2 hours before sunset. If you're already spending the cash on the session, why not set yourself for the most fabulous photos ever?

10. do something fun

This one is a little vague, but it's also important and goes along with tip #5. If you aren't having fun, why the hell are you doing this in the first place? If you're having trouble thinking of locations, think instead of what you would do on a perfect date. Or if you had the day off to do anything with your family, where would you go? As a photographer, I like giving this tip in trade of location suggestions. You are unique and you have your own hobbies and places that bring a smile to your face just by being there (hello, Disney Land!). Run ideas and brainstorm what you want to DO during your session. Interaction with your partner and your location is the recipe for an amazing session.

*bonus tip!*

11. Choose a photographer who you like just as much as a person as you do their work

best-los-angeles-photgrapher-casey-brodley.jpg

Have you ever been on a really bad first date? Or tried to sit through an uncomfortable interview? That's how I relate working with a photographer whose personality you don't jive with. Sure, their work may be beautiful, but would you want to spend time with them outside of a photo session? Would they fit in around your friends? Hop on a video chat or ask to meet up with potential photographers in-person before you decide on hiring them. If you can't get through a 10-minute conversation with them, how are you going to get through an hour plus photo session? Or even worse, a ten-hour wedding day? Your photographer is the one vendor who is paid to be in your face more than anyone else. Make sure you like them. If you don't like your photographer...


I hope these tips help! Let me know if I forgot anything or what you think would be the perfect photo session! 

Until next time.

xo

Casey